Identifying Electrical Requirements: How To Install Bathroom Light Fixture Junction Box

How to install bathroom light fixture junction box – Installing a bathroom light fixture junction box requires an understanding of the electrical requirements to ensure safety and proper functionality.
To start the installation of a bathroom light fixture junction box, it’s important to consider the placement of your vanity light fixtures. Should they face up or down? Explore this topic further in our article on bathroom vanity light fixtures up or down.
Once you’ve made this decision, you can proceed with the installation of the junction box, ensuring a secure and functional connection for your bathroom lighting.
The junction box must be wired with the appropriate gauge wire for the amperage of the circuit. The amperage is determined by the wattage of the light fixture. A 15-amp circuit is typically used for bathroom lighting, which can accommodate up to 1800 watts of lighting. The voltage should be 120 volts, which is the standard voltage for residential electrical systems.
Safety Precautions
- Always turn off the power at the breaker before working on any electrical wiring.
- Use a voltage tester to confirm that the power is off.
- Wear safety glasses and gloves when working with electrical wires.
- Follow all local electrical codes and regulations.
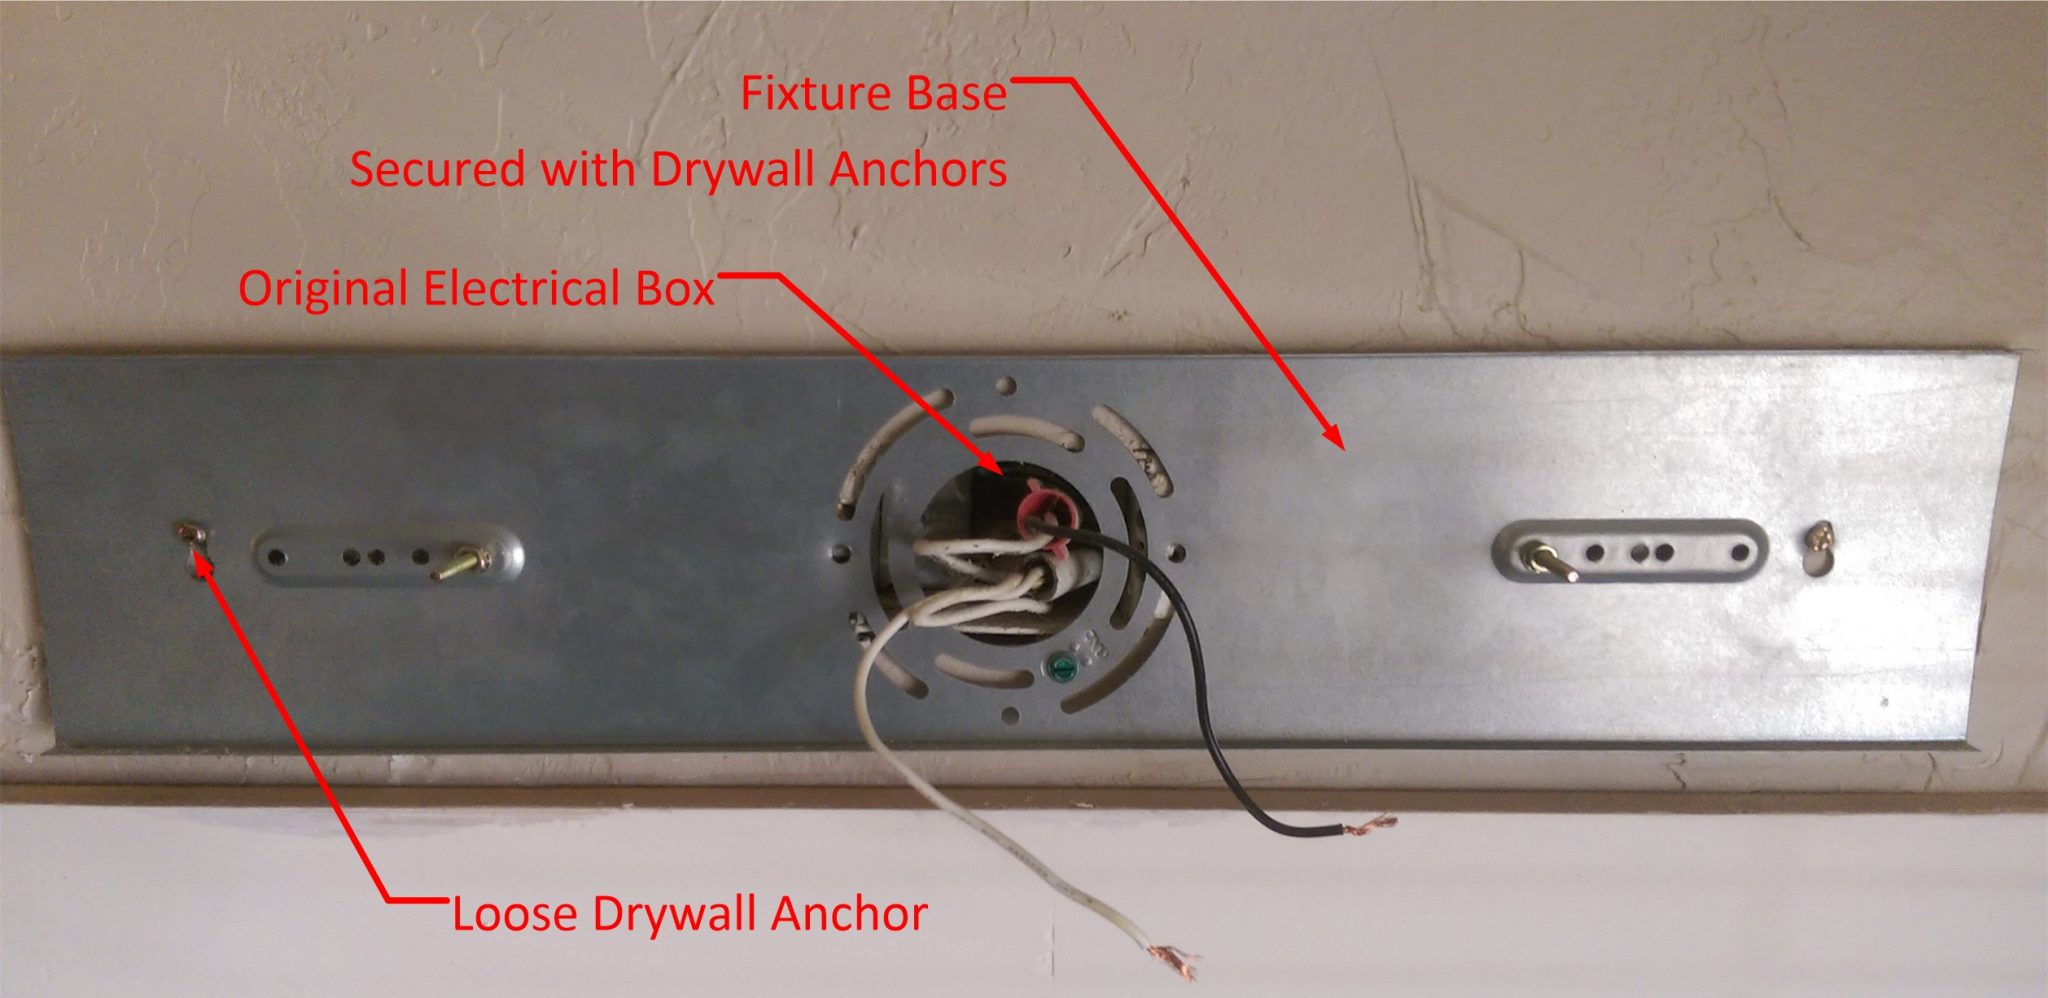
Junction Box Placement and Installation

Selecting the optimal location for the junction box is crucial to ensure proper lighting distribution and adherence to electrical codes. It should be strategically positioned based on the bathroom layout, considering the location of fixtures, switches, and outlets. The junction box should be easily accessible for future maintenance and repairs.
Installing the Junction Box
- Determine the precise location of the junction box based on the desired lighting layout and electrical requirements.
- Drill a hole in the ceiling or wall using an appropriate drill bit for the size of the junction box.
- Insert the junction box into the hole and secure it using screws or nails.
- Run electrical wires from the circuit breaker panel to the junction box, ensuring they are properly sized and insulated.
- Connect the wires to the junction box terminals, ensuring secure connections and proper polarity.
Connecting the Light Fixture
After the junction box is securely installed, it’s time to connect the light fixture. This process involves connecting the wires from the light fixture to the wires in the junction box and securing the fixture in place.
Wiring the Fixture
Turn off the power at the circuit breaker or fuse box before starting any electrical work. Use wire nuts or other appropriate connectors to connect the wires from the light fixture to the wires in the junction box. Match the colors of the wires: black to black, white to white, and green or bare copper to the ground wire. Twist the wire nuts clockwise until they are snug.
Securing the Fixture
Once the wires are connected, carefully lift the light fixture into place and align it with the mounting bracket. Secure the fixture to the mounting bracket using the screws or bolts provided. Make sure the fixture is tight and level.
Grounding the Fixture, How to install bathroom light fixture junction box
Proper grounding is essential for safety. Ensure that the light fixture is properly grounded by connecting the ground wire from the fixture to the ground wire in the junction box. Use a green or bare copper wire for grounding. Twist the wires together and secure them with a wire nut.
The junction box is the core of your bathroom lighting setup. Once you’ve installed it, you can start thinking about energy efficient bathroom lighting options. These can save you money on your energy bills and help reduce your carbon footprint.
After you’ve chosen your lighting, you can complete the installation by connecting the wires and securing the light fixture in place.
